Photo Printing 04A) Setting an Accelerated Print Production Time Option
In this article, we will show you how to create an accelerated production time option for your photo print.
1
The first step is to open the photo tab in your MyDakis account.
2
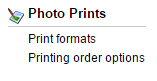
Next, under the photo prints heading, click on printing order options.
3
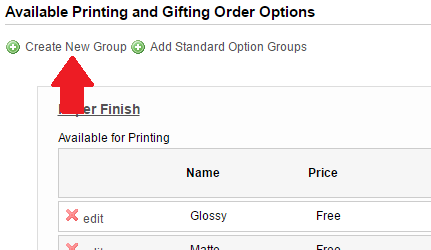
Once on the printing and gifting order options page, click on create new group.
4
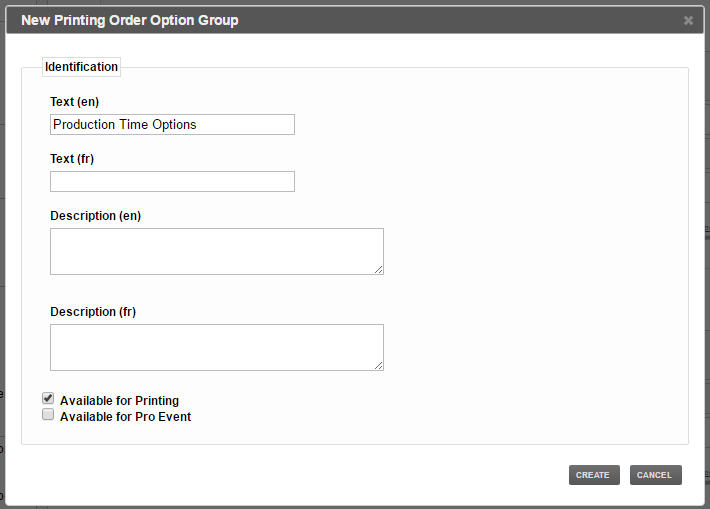
Add a title such as production time options, and continue filling the rest of the fields. When you are done, click the create button in the bottom right.
5
Your new option group as now been created. to add options, click on create new options.

6
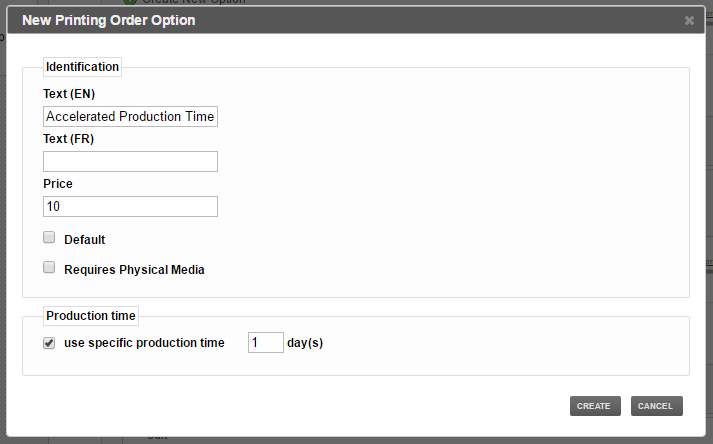
You can now create the accelerated print production time option. Enter the name of the option, enter the price of the option and check the use specific production time box. You can now choose how long the production time will be. Once you are done configurating the option, click the create button.
Note that for this option to work, you will first need to set the production time of your photo prints to a longer production time. Click here to find out how to set your print production time.
7
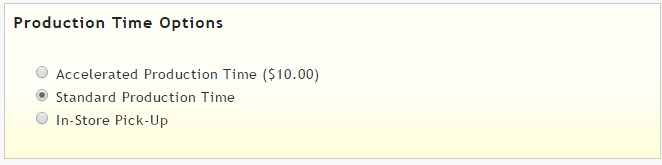
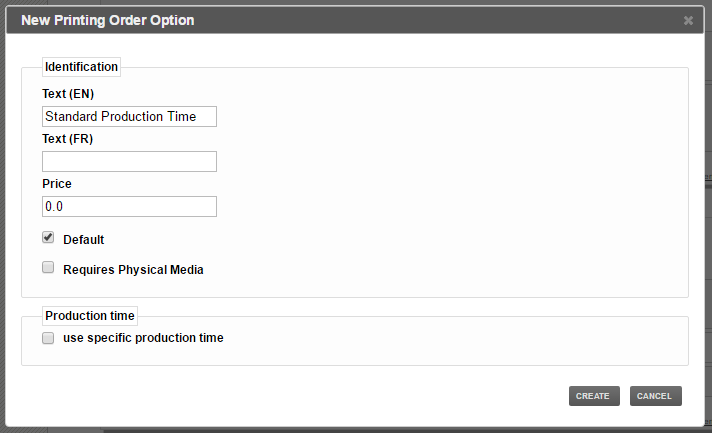
You will now want to create a second option in the group called standard production time. Leave the price at 0, check the default box meaning that when customers are checking out, this will be selected, by default. Do not check the use specific production time box. This means that when ordering, the option will use the selected production time of the photo prints you have set.
8
If you like, you can also create a final option called In-Store Pick-Up which will allow customers to come to your store and get the product themselves.

9
You are now done and your customers will be able to choose the option they wish when ordering.